

The Best Way to Clean Retainers: A Proven Guide
So, what's the best way to keep your retainer clean? It really boils down to a simple daily habit: rinse it with lukewarm water and give it a gentle brush with a soft toothbrush and some non-abrasive soap. This quick daily clean stops bacteria and plaque from building up, keeping your retainer fresh and hygienic. To go a step further, a weekly soak in a specialised cleaning solution is a great idea to maintain its clarity and make sure it lasts.
Why Cleaning Your Retainer Is Non-Negotiable
You’ve put in the time and effort to get that perfect, straight smile. Now, your retainer is the single most important thing protecting that investment, making sure your teeth don’t start wandering back to where they used to be. But just wearing it isn't the whole story. Keeping it clean is just as crucial for your oral health.
Try to think of your retainer as another set of teeth. It sits in your mouth for hours at a time, coming into contact with all the same bacteria, saliva, and tiny food particles. If you don't clean it regularly, it quickly becomes a perfect home for germs.
The Hidden Risks of a Dirty Retainer
When a retainer isn't cleaned properly, it develops a sticky, invisible film of plaque. This build-up might not seem like a big deal at first, but it can lead to a few unpleasant problems.
- Bad Breath and Nasty Odours: Bacteria feast on the gunk left on your retainer, and the waste they produce causes some seriously stubborn bad breath.
- Plaque Hardening into Tartar: If that plaque isn't brushed away, it can calcify and harden into tartar. This creates a crusty, rough deposit that’s much harder to get off and can really irritate your gums.
- Increased Oral Health Risks: Every time you pop a dirty retainer back in, you’re reintroducing a concentrated dose of bacteria into your mouth. This can increase your chances of developing cavities and gum inflammation. You can learn more about how plaque leads to gum disease.
- Discolouration and Staining: For anyone with clear retainers, plaque and tartar build-up will quickly make them look cloudy, yellow, and stained, which kind of defeats the purpose of having a discreet appliance.
> A clean retainer isn't just about looks—it's a core part of keeping your teeth and gums healthy for years to come.
The good news? Getting into an effective cleaning routine isn't complicated or expensive. It’s all about being consistent and using the right techniques to protect your hard-earned smile.
Your Daily Retainer Cleaning Routine
The secret to keeping your retainer fresh and doing its job properly isn't complicated. It all comes down to building a simple, consistent daily habit. Just like you brush your teeth every day, giving your retainer a quick clean each morning and night is your best defence against plaque, bacteria, and that dreaded retainer smell.
Think about it—everything in your mouth ends up on your retainer. Saliva, food particles, and bacteria create a sticky, invisible film. If you leave it, that film hardens into plaque, and that’s when the problems start. A simple daily clean stops this cycle in its tracks.
The Gentle Brushing Method
The heart of your daily routine is a gentle scrub. You don't need any fancy gadgets or harsh chemicals for this part; a soft-bristled toothbrush and some lukewarm water are all it takes.
It's a really good idea to have a separate toothbrush just for your retainer. This avoids transferring plaque and bacteria from your teeth right back onto your clean appliance.
Here’s the quick process to follow every time you take your retainer out:
- Rinse it right away. A quick swish under lukewarm water washes away fresh saliva and any loose debris before it can dry on and harden.
- Gently brush everywhere. Use your soft brush to clean all the surfaces, inside and out. Pay special attention to the little nooks and crannies where build-up loves to hide.
- Give it one last rinse. Another good rinse under lukewarm water will wash away anything you've just brushed off.
This whole process takes less than a minute but makes a world of difference. It’s especially important for clear plastic retainers, like those from Invisalign treatments, as it’s the key to keeping them looking crystal clear.
Why You Must Avoid Toothpaste
It feels like common sense to just use your regular toothpaste, right? Unfortunately, this is one of the biggest mistakes people make. Most toothpastes contain mild abrasives designed to polish tough tooth enamel, but those same ingredients are way too harsh for the softer plastic of your retainer.
> Using toothpaste on your retainer creates thousands of microscopic scratches on its surface. You won't see them, but these tiny grooves are the perfect hiding spot for bacteria, leading to a cloudy, smelly retainer that's much harder to get truly clean.
This isn’t just our opinion; it’s the standard advice from dental professionals everywhere. Sticking to a gentle, non-abrasive cleaning routine is the most effective way to prevent damage and keep your appliance in top condition for years. For more expert advice, you can learn more about professional retainer care advice from Orthodontics Australia.
Effective Deep Cleaning Methods for Your Retainer
Your daily brush-off is fantastic for keeping surface grime at bay, but a weekly deep clean is your secret weapon for tackling the stubborn stuff. Think of it as a reset button for your retainer’s hygiene. This more thorough clean gets into every nook and cranny to fight lingering bacteria, clear away odours, and keep your appliance feeling brand new.
These methods go beyond a simple scrub, using safe soaking solutions to dissolve the invisible films and early signs of tartar that a quick brush can easily miss. Making this a once-a-week habit is a small time investment that pays off big time for the health and lifespan of your retainer.
For a quick refresher on the daily essentials, this little guide covers the core habits you should be doing every day.
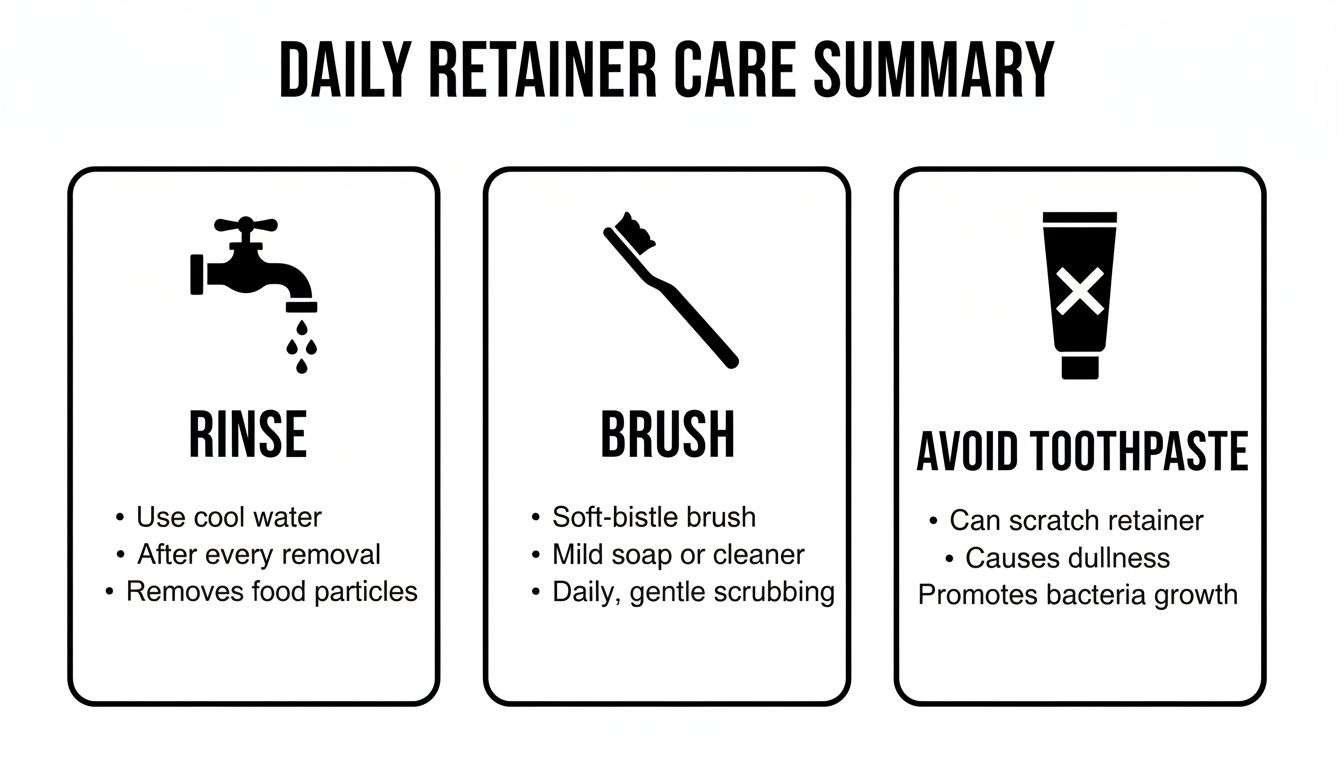
Honestly, just sticking to these three basics—rinsing after every use, giving it a gentle brush, and avoiding harsh toothpaste—will put you way ahead of the curve.
Simple and Safe At-Home Soaks
You really don't need fancy, expensive products to give your retainer a proper deep clean. In fact, some of the most effective solutions are probably sitting in your kitchen pantry right now. These at-home remedies are gentle on your appliance but tough on the gunk you want to get rid of.
White Vinegar Solution A simple 50:50 mix of white vinegar and lukewarm water makes for a brilliant disinfecting soak. The acetic acid in vinegar is a natural powerhouse when it comes to breaking down tartar and killing off bacteria.
- Pop your retainer into the solution, making sure it’s completely submerged.
- Let it soak for about 15-20 minutes—any longer and you risk damaging the material.
- After the soak, give it a light brush with a soft-bristled toothbrush and rinse it really well under cool water to wash away that vinegar taste.
Baking Soda Paste or Soak Baking soda is another kitchen hero. It’s a natural deodoriser and a very mild abrasive, so it helps lift stains and neutralise smells without scratching the plastic.
For a soak, just dissolve two teaspoons of baking soda in a cup of lukewarm water and let your retainer sit for 20 minutes. If you’re dealing with a bit of film, you can also make a paste with baking soda and a little water, apply it with your toothbrush, scrub gently, and rinse everything off.
> A weekly deep clean isn't just about what you can see. It's a crucial preventative step that stops plaque from hardening into tartar—which is much tougher to remove and can eventually damage your retainer.
What About Commercial Cleaning Tablets?
If you're looking for a convenient, no-mess option, you can't go wrong with retainer cleaning tablets. These effervescent tablets are specifically designed to kill 99.9% of odour-causing bacteria and dissolve stains without being too harsh on your retainer's material.
They couldn't be easier to use. You just drop a tablet into a glass of water, add your retainer, and let it fizz away. Just be sure to follow the instructions on the box for the right soaking time, which is usually around 15 minutes. While they do cost a bit more than a bottle of vinegar, their effectiveness and sheer convenience make them a popular choice, especially if you have a busy schedule.
How to Clean Different Types of Retainers
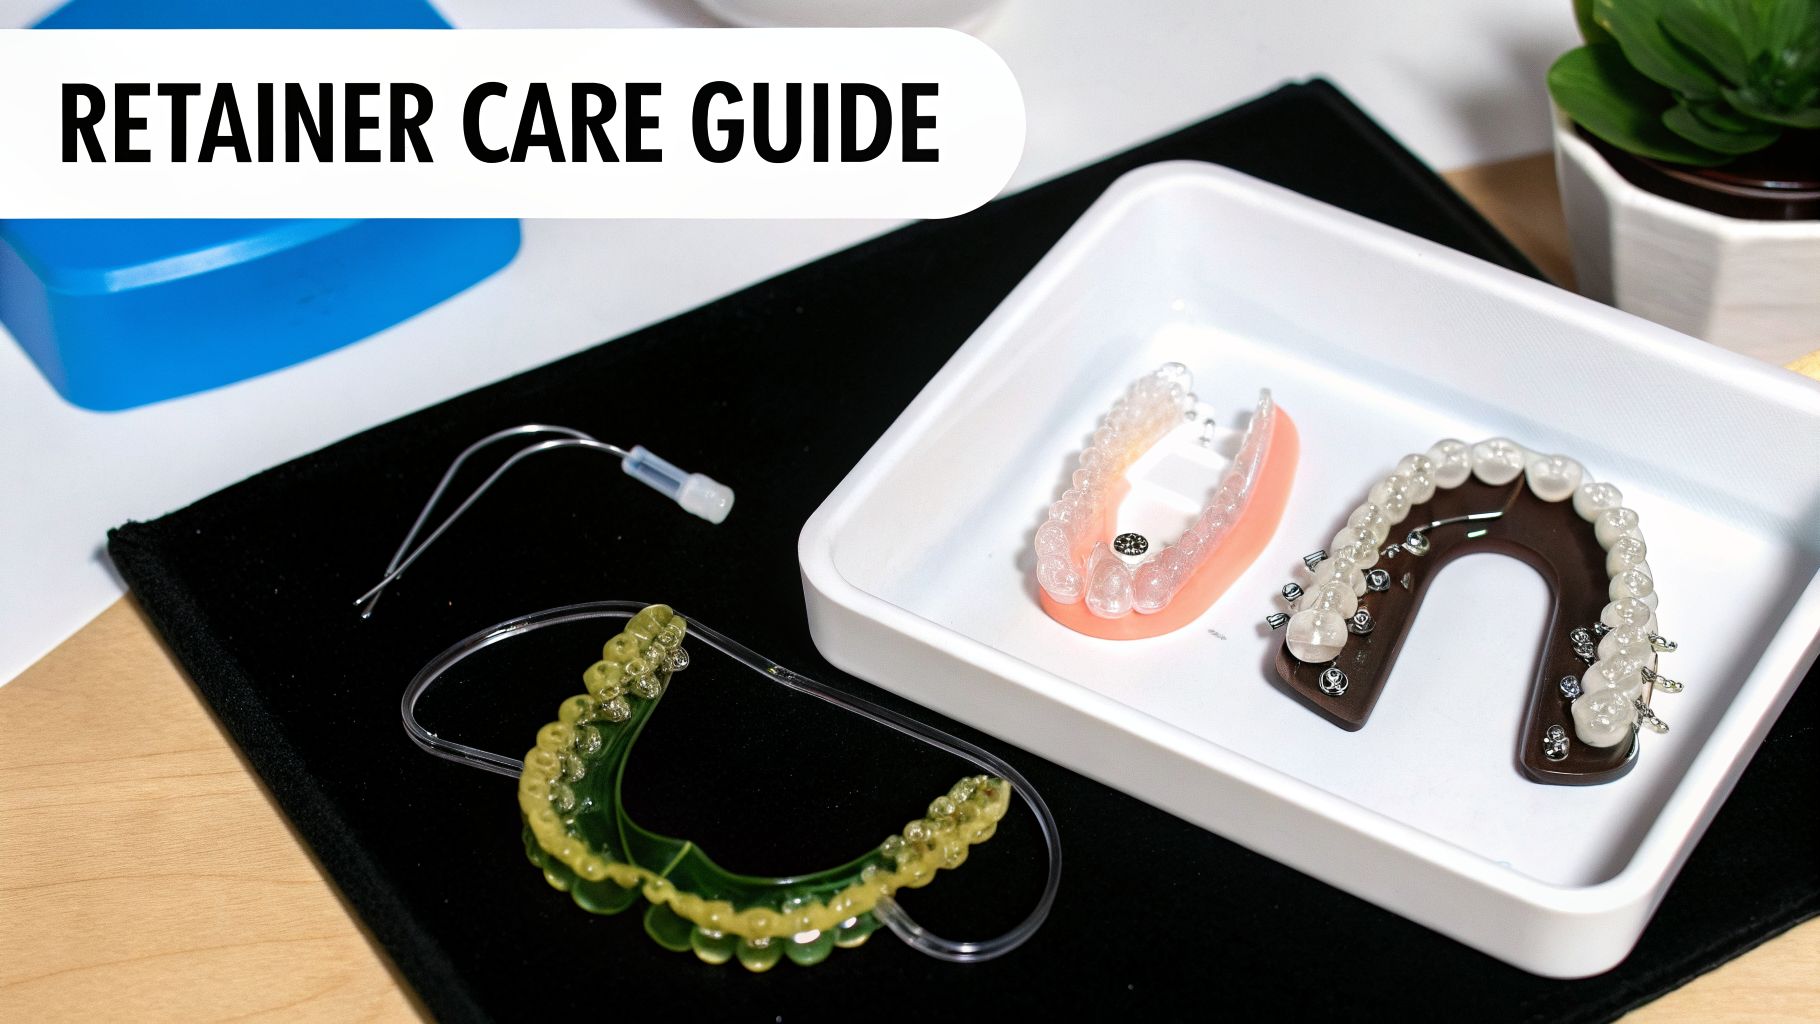
It’s a common mistake to think all retainers can be cleaned the same way. The truth is, the best way to clean your retainer depends entirely on what kind you have. Using the wrong method isn't just ineffective; it can actually damage your appliance over time.
To really get your retainer clean and help it last as long as possible, you need to match your cleaning routine to its specific material and design. Let’s walk through the right techniques for the three main types of retainers we see here in Australia.
Cleaning Clear Essix and Vivera Retainers
Those clear plastic retainers are fantastic because they're practically invisible, but that also means they need a bit of extra care to stay that way. The biggest culprits are yellowing stains and a cloudy appearance, which usually comes from plaque build-up or tiny scratches.
- Always use cool or lukewarm water. Never use hot water! It can easily warp the delicate plastic, which means it won't fit properly anymore.
- A very soft toothbrush is a must. Gently brushing with a non-abrasive soap is the perfect way to clean it daily without scratching the surface.
- Make weekly soaks a habit. Soaking your retainer in a specialised cleaning solution or even a simple baking soda mix does wonders for lifting stains and keeping the plastic looking crystal clear.
It's no surprise that this style of retainer is so common. In Australian dental practices, they are the go-to choice for upper teeth. In fact, research shows 59.3% of dentists prescribe these transparent models exclusively for the upper arch, while about half recommend a mix of bonded and clear retainers for the lower jaw. These findings on Australian retainer prescription habits really show why mastering the cleaning technique for clear appliances is crucial for so many people.
Caring for Traditional Hawley Retainers
The classic Hawley retainer—the one with the acrylic plate and metal wire—is a real workhorse. It’s tough, but it has its own cleaning quirks. That little spot where the wire meets the acrylic is a magnet for plaque, so it needs special attention.
When you're cleaning it, use your soft toothbrush to carefully scrub around the wires and get into all the nooks and crannies of the acrylic plate. The same soaking solutions you'd use for clear retainers, like cleaning tablets or a vinegar solution, work great here too. They'll disinfect and deodorise the acrylic without causing any harm to the metal parts.
> A great tip for cleaning a Hawley retainer is to focus on the textured inner surface of the acrylic plate. Since this part sits against the roof of your mouth, it can trap a surprising amount of bacteria.
Tackling Fixed or Bonded Retainers
A fixed retainer, that little wire permanently glued to the back of your teeth, requires a completely different approach. Because you can’t remove it, your cleaning routine has to work *around* it.
This is where special tools become your best friends. Things like floss threaders or interdental brushes are essential for getting floss underneath the wire and cleaning between each tooth. If you skip this, plaque can build up quickly and lead to cavities or gum problems. A water flosser is another fantastic tool for flushing out debris from around the wire and the bonding material. The daily care is quite similar to looking after other oral appliances, like the custom night guards we provide for teeth grinding.
Tackling Common Retainer Cleaning Headaches
Even if you’re a pro at your daily cleaning routine, some pesky issues can still pop up. Maybe your clear retainer has taken on a yellow hue, or you've noticed a funky smell or some crusty white spots that just won't budge. It's frustrating, but don't worry—most of these common headaches have pretty straightforward fixes you can do at home.
First, let's look at what's actually going on. That yellowish tinge? That's usually just staining from things we all love, like coffee, tea, or even colourful foods. And those stubborn white spots are typically calculus (tartar), which is just plaque that wasn't cleaned off and has hardened over time.
Getting Rid of Yellow Stains and Discolouration
When your clear retainer starts looking a bit dingy, a good deep clean is usually all it takes to bring back its clarity. A great trick is to give it a soak in a solution of half white vinegar and half lukewarm water. Just 20 minutes should be enough to lift a lot of those surface stains.
Another fantastic home remedy is a simple baking soda paste.
- Mix a little baking soda with a few drops of water until you get a paste-like consistency.
- Use your soft-bristled toothbrush to gently apply it all over the retainer.
- Let it sit for a few minutes, then give it a light scrub and rinse it off completely.
The baking soda is a mild abrasive, so it's brilliant at buffing away minor discolouration without scratching the plastic. It’s an easy and cheap way to keep your clear retainer looking, well, clear.
Removing Stubborn White Spots or Tartar
Those hard, white deposits are a bit tougher to crack. They form when plaque hangs around on your retainer for too long and mineralises. The key here is to soften the tartar before you try to scrub it off.
Soaking your retainer in full-strength white vinegar for about 30 minutes can work wonders. The acid in the vinegar helps to dissolve the mineral deposits. After it's had a good soak, take your soft toothbrush and gently scrub at the softened spots. For really stubborn build-up, you might need to repeat this a couple of times, but it’s a safe and effective way to get the job done.
> Expert Tip: The best way to troubleshoot these issues is to prevent them in the first place. If you're constantly fighting stains or tartar, it probably means your daily cleaning routine could use a little tweak. A more thorough brush each day is often the simplest solution.
It's also interesting to note that while soaking is great for problem-solving, good old-fashioned brushing is incredibly powerful. Research has shown that mechanically brushing a retainer with just water is a highly effective cleaning method. One study even found that adding a chemical soak didn't make a significant difference in reducing bacteria compared to brushing alone. If you're curious, you can read more about the research highlighting the effectiveness of simple brushing techniques and see just how vital that daily habit is.
Finally, don't forget about your retainer case! Your retainer spends hours in there every day. If the case is dirty, you're just putting your clean retainer back into a germy environment. Give the case a wash with warm, soapy water daily and let it air dry completely to keep everything fresh and clean.
When It’s Time to Call the Dentist
Even the best at-home cleaning routine can’t fix everything. Your retainer is a custom-made orthodontic tool, and it needs a professional eye on it from time to time to make sure it’s still doing its job properly.
Knowing when to pick up the phone and book a visit can save you a lot of hassle and protect your investment in that straight smile. While retainers are built to be durable, they aren't invincible. Life happens—they can get dropped, sat on, or accidentally left in a hot car. That's why giving your retainer a quick daily inspection is a great habit to get into.
Red Flags That Need a Professional Check
Think of us as your support team for retainer care. If you spot any of these issues, please don't attempt a DIY fix. It’s definitely time to give us a call at Oasis Smiles.
- You can see cracks or fractures. Even a hairline crack is a big deal. It weakens the entire retainer and creates the perfect little hiding spot for bacteria.
- The shape looks warped or distorted. If your retainer has been exposed to heat, it can warp out of shape. A misshapen retainer won't fit right, which means it's not keeping your teeth where they should be.
- It just doesn't fit properly anymore. A retainer that suddenly feels loose, too tight, or just ‘off’ is a major warning sign. This could mean your teeth are trying to shift, or the appliance itself is damaged.
> A poorly fitting or broken retainer is worse than wearing no retainer at all. If you keep using a damaged appliance, you risk guiding your teeth into the wrong position and undoing all the progress you made with your braces.
A great habit to get into is bringing your retainer along to your regular dental appointments. It gives our team at Oasis Smiles Dental a chance to check it over for any subtle wear and tear you might have missed. We can also pop it in our ultrasonic cleaner to get rid of any stubborn build-up.
Ultimately, regular dental checkups and cleans are the best defence for keeping both your teeth and your retainer in top condition for the long haul.
Got Questions About Cleaning Your Retainers? We’ve Got Answers
We hear a lot of the same questions from our patients about keeping their retainers in top shape. It's totally understandable—you've invested a lot in your smile, and you want to protect it. Let's tackle some of the most common queries that come up.
A big one we often hear revolves around heat. People naturally think hot water equals a better clean, but when it comes to your retainer, that's a recipe for disaster.
Can I Use Boiling Water to Disinfect My Retainer?
Please don't! This is one of the most important rules. Never, ever use boiling or even very hot water on your retainer.
The plastic is custom-moulded to fit your teeth perfectly. High heat will instantly warp and distort that shape, completely ruining the fit. A retainer that doesn't fit properly can't do its job of keeping your teeth straight, and might even cause them to shift.
Always stick to lukewarm or cool water for every single rinse and clean. It’s more than enough to wash away plaque and food bits without risking any damage to the retainer itself.
How Often Should I Be Deep Cleaning My Retainer?
Your daily clean is your first line of defence, but a deeper clean should happen at least once a week. Think of this as a reset button for your retainer. A good weekly soak dissolves any sneaky build-up or bacteria that your daily brush might have missed.
If you start to notice a funny smell, a cloudy look, or stubborn white spots appearing more often, don't hesitate to bump up your deep clean to twice a week.
> The key to a truly clean retainer is consistency. That weekly soak is your secret weapon against long-term problems like tartar build-up and yellowing, stopping them before they even get a chance to start.
Is It Okay to Soak My Retainer in Mouthwash?
It might seem like a good idea, but we strongly advise against soaking your retainer in mouthwash. The main culprits here are alcohol and bright colouring.
Alcohol can dry out the plastic over time, making it brittle and much more likely to crack. And if you have a clear retainer, those brightly coloured mouthwashes can stain it, which kind of defeats the purpose of having an invisible appliance!
It's much safer to stick to the approved soaking solutions we talked about earlier. They're designed to be effective without causing any harm.
--- Your smile is a lifelong investment, and our team at Oasis Smiles Dental is here to help you protect it. For professional advice or to schedule a check-up for you and your retainer, book an appointment with us today.